Bad blogger! I've been neglecting this space again. But on a positive note, we've had twelve straight days of sunshine - a run not to be sniffed at in this part of the world. We took advantage of the long Easter weekend and went camping with a group of friends at this campsite. What a fantastic time we had! Campfires, sing-songs, a hike up White Horse Hill to admire the breathtaking view and plenty of good eating.
We were blessed with the hottest April weather any of us could remember, and laughed about being woken by the crowing cockerel and singing birds every morning. The ten children in our camp took turns whacking homemade pinatas full of Easter treats, and on Sunday we had a field-sized Easter egg hunt. Truly a magical weekend.
We did miss out on some of our usual Easter traditions, though, being away from home. So we are planning another small family celebration of the season this weekend. We will be dying eggs (naturally, with turmeric, beets, blueberries, onion skins and dandelions), and I'm sure the little ones' Easter baskets - filled with little treasures - will be making an appearance. There won't be as many handmade goodies as last year, but thanks to my Four Seasons Exchange partner, these delightful bunnies will be in the baskets.
Here is the Spring package we sent Andreja:
A needlefelted bumblebee, knitted eggs and nest from The Purl Bee, a birch card-holder, postcard and a dandelion-dyed playsilk. We really hope she liked it!
Well, the sun is gloriously shining again, this morning, so I need to get out and make the most of it - I have a backlog of seedlings that need attention. Happy day to you!
Showing posts with label seasonal crafts. Show all posts
Thursday, 28 April 2011
sunshine aplenty
Labels:
celebrations,
outdoors,
seasonal crafts
Tuesday, 26 October 2010
beeswax walnut candles
The girls and I made candles as part of our handmade Christmas preparations. Many of these little treasures will become gifts, and yet more will light our home through the darkest nights of December. This is an easy craft that little ones can help with (although most of the tasks will need to be undertaken by a grown up).
You will need:
beeswax pellets or a solid block of beeswax, grated
candle wick
walnut shells (or other small containers for the wax)
double-boiler (for ease of clean up we used a clean tin can - I also squished the sides of the can to create a pouring spout)
metal baking tray
bowl of very cold water (in case of a burn)
1. Gather walnut shells, large acorn caps, hazelnut shells, seashells...any small, natural container. You could make double-wick candles in peanut shells! The shells should be empty, clean and in complete halves. Ideally they will have a reasonably stable base.
2. Put your beeswax pellets in a double-boiler. Bring the water in the larger pan to the boil and supervise the wax, stirring occasionally, until liquified. Do not let any water get into the wax. While the wax is melting, arrange your shells on a metal baking tray (any wax that spills onto the tray can be popped off once cooled - stubborn wax spills will pop off if you put the tray in the freezer for a couple of minutes). I added some leftover wax from an orangey harvest-scented candle stub...the scent complemented the beeswax smell nicely and deepened the natural golden colour.
3. When the wax has melted, take it off the heat and allow to cool for a couple of minutes. Stir again before using.
4. We found that dipping the wick into the hot wax and letting it cool until hardened (only takes a few seconds) made the wick much easier to handle. Once the wax has hardened, you can snip the stiffened wick into approximately 1 inch lengths (or to whatever length is suitable for your container).
5. Slowly and carefully, pour the hot wax into each shell (this is a job only for adults - the wax will be very hot and will stick to skin). I filled about 5 shells at a time before stopping to insert wicks.
6. Gently push a piece of wick into the centre of each wax-filled walnut. The more liquid the wax is when you push the wick in, the less likely you are to get an unsightly air bubble rising to the surface. There is an art to getting the wick in at just the right moment - too hot and the wax won't support the wick, too cool and you'll disturb the surface - but after a few attempts you'll figure it out.
7. Allow the walnut candle to cool. Ours solidified within a couple of minutes and took about 15 minutes to cool completely. The wax changes colour slightly as it cools (you can see this in the above photo).
We have only burned one of our walnut candles so far and it lasted about half an hour. I can't wait to give these to loved ones for Christmas!
You will need:
beeswax pellets or a solid block of beeswax, grated
candle wick
walnut shells (or other small containers for the wax)
double-boiler (for ease of clean up we used a clean tin can - I also squished the sides of the can to create a pouring spout)
metal baking tray
bowl of very cold water (in case of a burn)
1. Gather walnut shells, large acorn caps, hazelnut shells, seashells...any small, natural container. You could make double-wick candles in peanut shells! The shells should be empty, clean and in complete halves. Ideally they will have a reasonably stable base.
3. When the wax has melted, take it off the heat and allow to cool for a couple of minutes. Stir again before using.
4. We found that dipping the wick into the hot wax and letting it cool until hardened (only takes a few seconds) made the wick much easier to handle. Once the wax has hardened, you can snip the stiffened wick into approximately 1 inch lengths (or to whatever length is suitable for your container).
5. Slowly and carefully, pour the hot wax into each shell (this is a job only for adults - the wax will be very hot and will stick to skin). I filled about 5 shells at a time before stopping to insert wicks.
6. Gently push a piece of wick into the centre of each wax-filled walnut. The more liquid the wax is when you push the wick in, the less likely you are to get an unsightly air bubble rising to the surface. There is an art to getting the wick in at just the right moment - too hot and the wax won't support the wick, too cool and you'll disturb the surface - but after a few attempts you'll figure it out.
7. Allow the walnut candle to cool. Ours solidified within a couple of minutes and took about 15 minutes to cool completely. The wax changes colour slightly as it cools (you can see this in the above photo).
We have only burned one of our walnut candles so far and it lasted about half an hour. I can't wait to give these to loved ones for Christmas!
Labels:
handmades,
seasonal crafts,
tutorials
Friday, 1 October 2010
welcome, autumn
Ah, October the first. Crisp mornings, crunchy leaves underfoot, appley-cinnamonny smells wafting from the kitchen...well, in reality it has been raining since yesterday afternoon. The leaves are mostly still on the trees. And I used up most of our apples last weekend. But we have plenty to be excited about.
Today in Kindergarten we celebrated the festival of Michaelmas with bowls of steaming Dragon's Tail soup and still-warm bread rolls baked by the children. In this season, we remember how St. Michael, rather than slaying the dragon in a fit of blood-lust, instead calmly tamed it with his sword. We are reminded that we do not have to solve all our own problems; sometimes it is enough to acknowledge them and work with them with courage in our hearts. It is a time of gathering, of harvesting, of preparing for the long winter ahead - also with courage and warmth in our hearts.
For many years I have found this time of year to be challenging. I grew up in Florida - the Sunshine State. My cells and my bones and my goodwill crave sunshine and warmth. But southwest England is reknowned for slate skies, impossibly green fields, and swathes of earth that remain damp for nine months of the year. Fortunately, I have found that I can prolong the feeling of late-summer warmth by bringing it indoors. Warm colours, foliage that was at its best at the last moment of summer, images of cosy Autumnal life. These things help me to see the beauty of the new season, rather than the long, cold, grey months stretching before us.
Today in Kindergarten we celebrated the festival of Michaelmas with bowls of steaming Dragon's Tail soup and still-warm bread rolls baked by the children. In this season, we remember how St. Michael, rather than slaying the dragon in a fit of blood-lust, instead calmly tamed it with his sword. We are reminded that we do not have to solve all our own problems; sometimes it is enough to acknowledge them and work with them with courage in our hearts. It is a time of gathering, of harvesting, of preparing for the long winter ahead - also with courage and warmth in our hearts.
For many years I have found this time of year to be challenging. I grew up in Florida - the Sunshine State. My cells and my bones and my goodwill crave sunshine and warmth. But southwest England is reknowned for slate skies, impossibly green fields, and swathes of earth that remain damp for nine months of the year. Fortunately, I have found that I can prolong the feeling of late-summer warmth by bringing it indoors. Warm colours, foliage that was at its best at the last moment of summer, images of cosy Autumnal life. These things help me to see the beauty of the new season, rather than the long, cold, grey months stretching before us.
Labels:
celebrations,
seasonal crafts
Sunday, 26 September 2010
rosehip garlands
If you have access to rosehips, now is a good time to start collecting them. We have had a touch of frost on one or two mornings this last week, so the hips are looking rosy and bright and are ever so slightly softening to the touch.
Rosehips are packed with vitamin C, and many people use them to make a syrup that can be drunk throughout the winter to help ward off illness. They are also believed to be helpful in relieving pain associated with arthritis. Rosehip seed oil has a high percentage of essential fatty acids, and is therefore thought to be very beneficial in keeping hair and skin looking healthy. We applied the oil to the scarring above Esme's eye when she had shingles as a baby. I'm not really sure if it helped reduce the appearance of the scars, but the act of massaging it gently into her skin certainly helped me to feel that I was doing something soothing and loving for my baby girl.
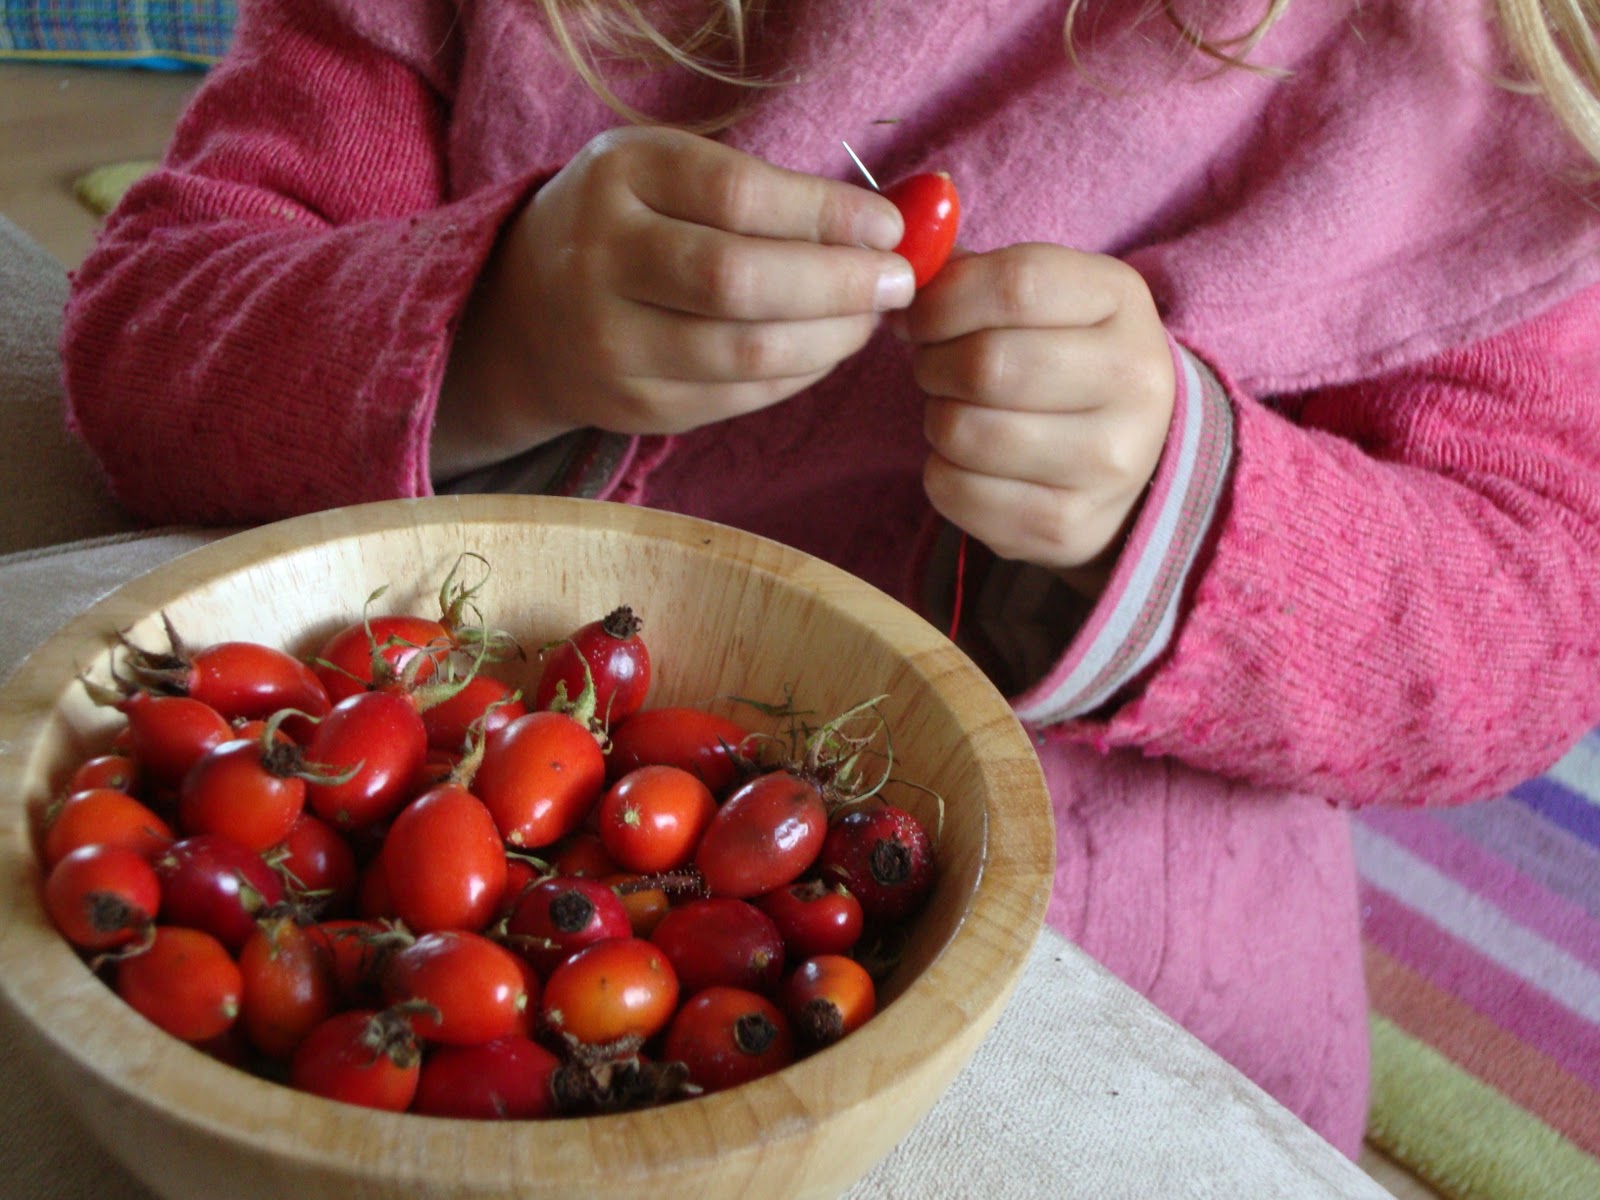
Eva and I put our first rosehip harvest to work as part of the seasonal decoration in our home - we strung them onto red thread and made cheerful, rosy garlands. I'm hoping they will dry as they hang across doorways and in our windows, and we plan to string them around the Christmas tree later this winter.
I so enjoyed a quiet couple of hours with my biggest girl, carefully piercing each hip with a large sewing needle and chatting about the tasks we had completed earlier at our school's workday. We both managed to prick our fingers with these huge needles, but it was something to be laughed at, together.
How very blessed I felt yesterday to have a daughter.
First, we snipped the hips from their stems.
I knotted the end of the thread, then triple-knotted it again about two inches further in. This left a 'circle' of knotted thread from which the finished garland could be hung. I then pierced the first hip and brought the needle around and back through once more (and did the same with the last hip on each string), so that the first and last hip acted like anchors.
Eva practised her counting skills...
...and showed me just how happy she was!
Labels:
handmades,
home,
seasonal crafts,
Waldorf
Subscribe to:
Posts (Atom)